Managing Repositories
| The processes are similar for URL and ZIP repositories but not exactly the same. The difference is mainly in the creation process and some other details, which will be mentioned in the corresponding steps. |
Creating Repositories
-
Click
 Catalog from the primary navigation menu.
By default, the Repositories page opens.
 -
Click Install a repository from the
Repositories page to add a new repository to the list. -
You can choose between:
Create a Zip archive of your repository and upload it on Saagie.
The .zipfile size limit is 10 Mo.-
Click Upload Zip archive.
-
Enter a name for your repository. It must be unique and up to 255 characters.
-
Click Choose file and select the required Zip archive in your file explorer.
-
Click Install a repository.
You are returned to the Repositories page updated with the newly added repository.
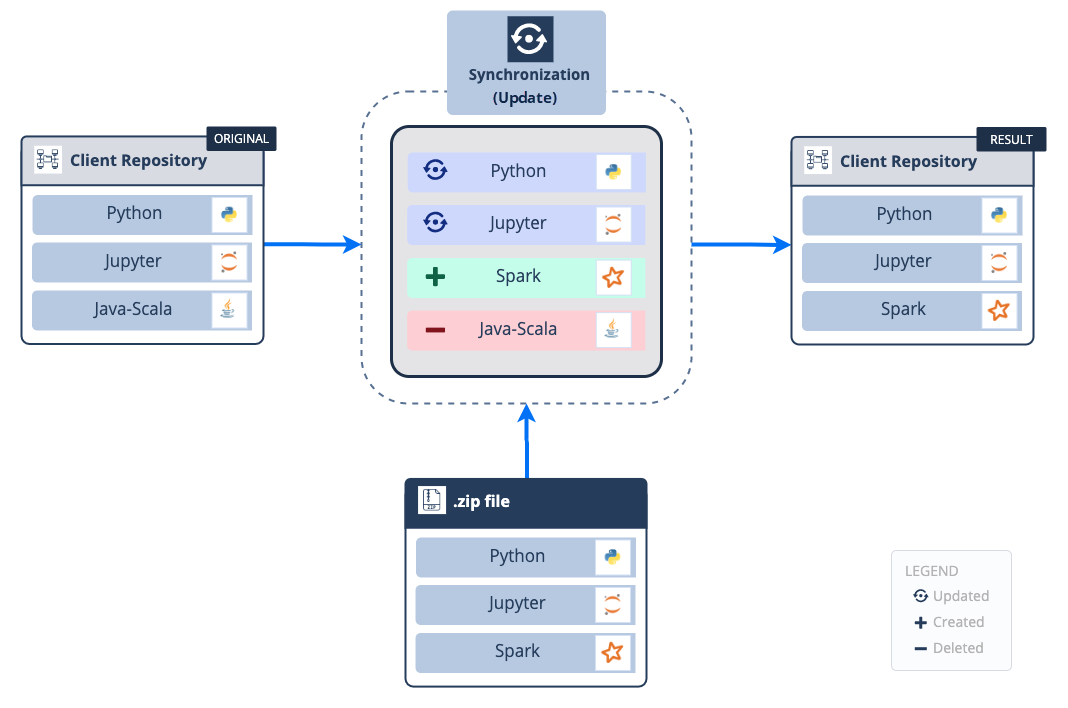
The initial synchronization of your repository is done automatically based on the information that you provided in the.zipfile.
Store your repository on a hosting platform and synchronize it with updates.
-
Click Fetch from URL.
-
Enter a name for your repository. It must be unique and up to 255 characters.
-
Enter the URL of the repository where you stored the
.zipfile.The .zipfile size limit is 10 Mo.You can use any HTTP server without authentication. For example, Saagie’s technology repository is exposed through a GitHub .zipfile accessible via the following URL:https://github.com/saagie/technologies/releases/latest/download/technologies.zip. -
Click Install a repository.
You are returned to the Repositories page updated with the newly added repository.
-
Updating Repositories
-
Click
Catalog from the primary navigation menu.
By default, the Repositories page opens, listing the existing repositories. -
From the list, click the repository you want to update to access its details.
The repository Overview page opens. This page displays information about the last update, such as when it was performed, by whom, how many technologies were updated, and how many times the repository was updated.
 -
Click Update technologies to update your repository.
A window opens and informs you that the update will add, update, and remove technologies according to the changes made to the.zipfile you selected. -
You can:
-
If you uploaded a
.zipfile directly from Saagie, you have to upload the new.zipfile. -
If you fetched your repository from a URL, you can edit the URL if the
.zipfile has been moved. It will redirect you to the repository settings. Edit the URL and click Save.
-
-
Click Update technologies to validate.
A progress bar is displayed while the technologies are updating.You can stop the update before it is complete by clicking Cancel the update below the progress bar.
Your repository is updated and you can track all the updates on its ![]() History page.
History page.
Reverting Updates
-
Click
Catalog from the primary navigation menu.
By default, the Repositories page opens, listing the existing repositories. -
From the list, click the repository you want to update to access its details.
The repository Overview page opens. -
Click
 History from the secondary navigation menu.
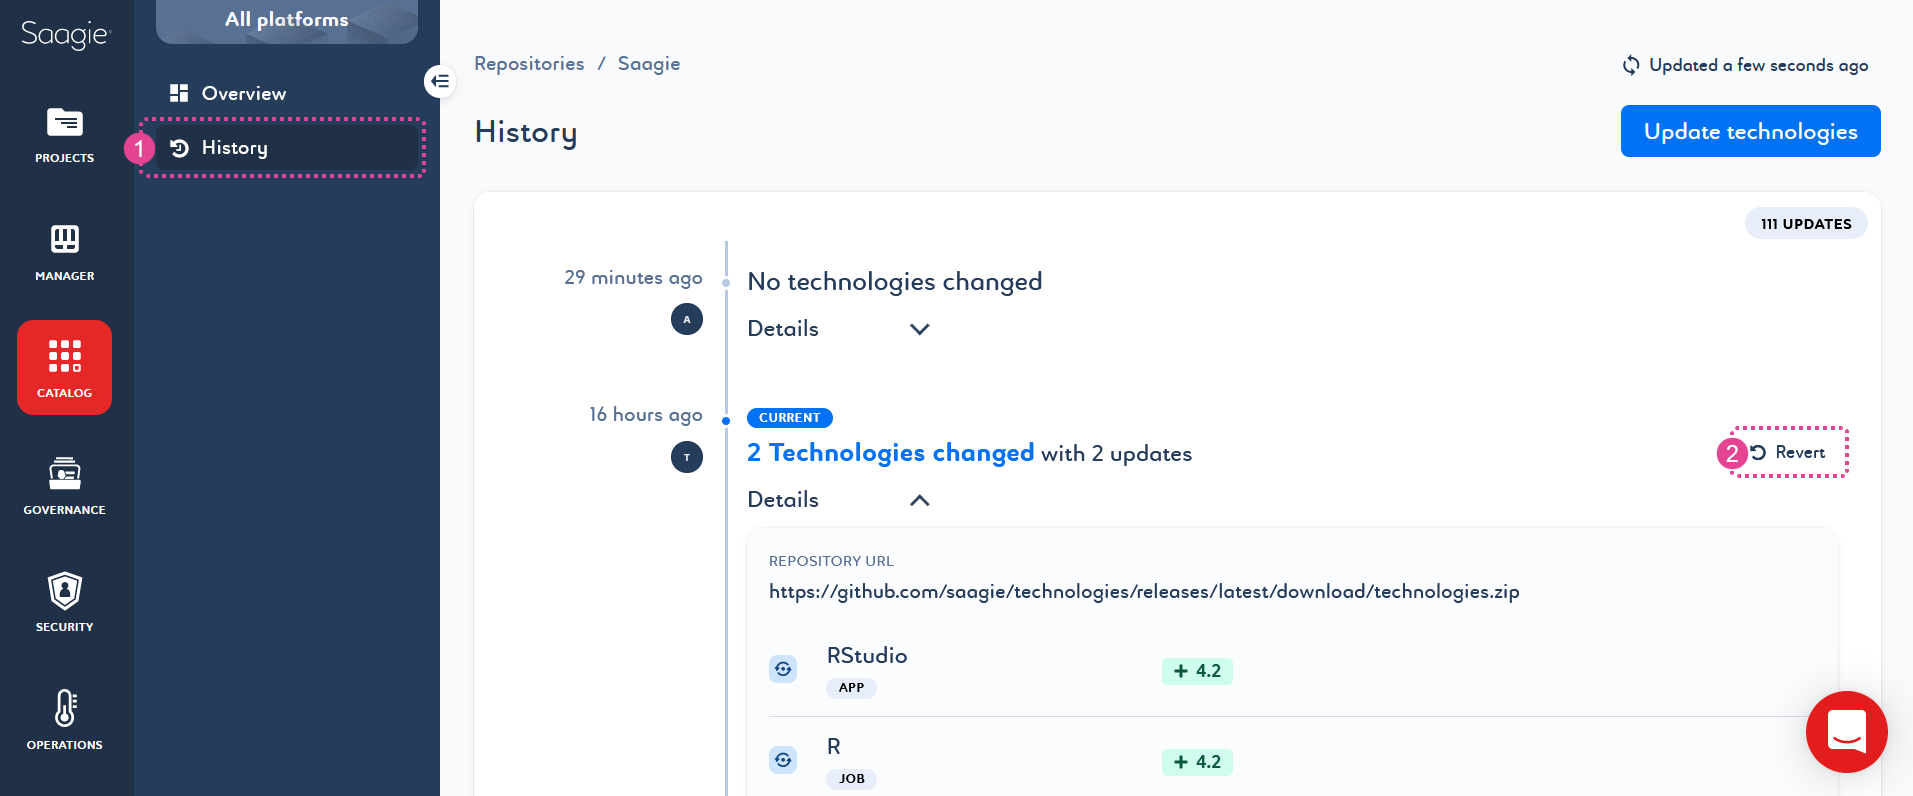
The History page opens. It gives you the history and allows you to keep track of the updates made. -
Click Revert next to the current update to return to the previous version.
A message appears to warn you that reverting the update of your repository will delete the current update. The deleted update is no longer available and this action cannot be undone. However, you can update your technologies again with the same
.zipfile by repeating the manual update procedure. -
Select the checkbox and click Confirm revert to validate.
| You may find yourself in a situation where you need to revert to an earlier update of your repository. Note that you can only revert to the update that immediately precedes the current version of your repository. If you need to revert to an earlier update, revert several times until you reach the correct version. |
Deleting Repositories
| Deleting a repository disable all jobs and apps using the technologies in that repository. |
-
Click
Catalog from the primary navigation menu.
By default, the Repositories page opens, listing the existing repositories. -
From the list, click the repository you want to update to access its details.
The repository Overview page opens. -
Click
 Repository settings in the right-hand corner of the Overview or History pages of the repository.
 -
Click the Danger Zone tab.
This setting allows you to delete your repository. -
Click Delete this repository.
A message appears asking you to confirm the deletion. -
OPTIONAL: Select the option to enable job and app deletion. This repository will disable all jobs and apps using the technologies in this repository.
-
Click Delete this repository again to confirm.
| There is a small period during which the deletion is processed and during which you will be able to cancel it. |