Job Settings
You can access the job settings from the Overview page of the job.
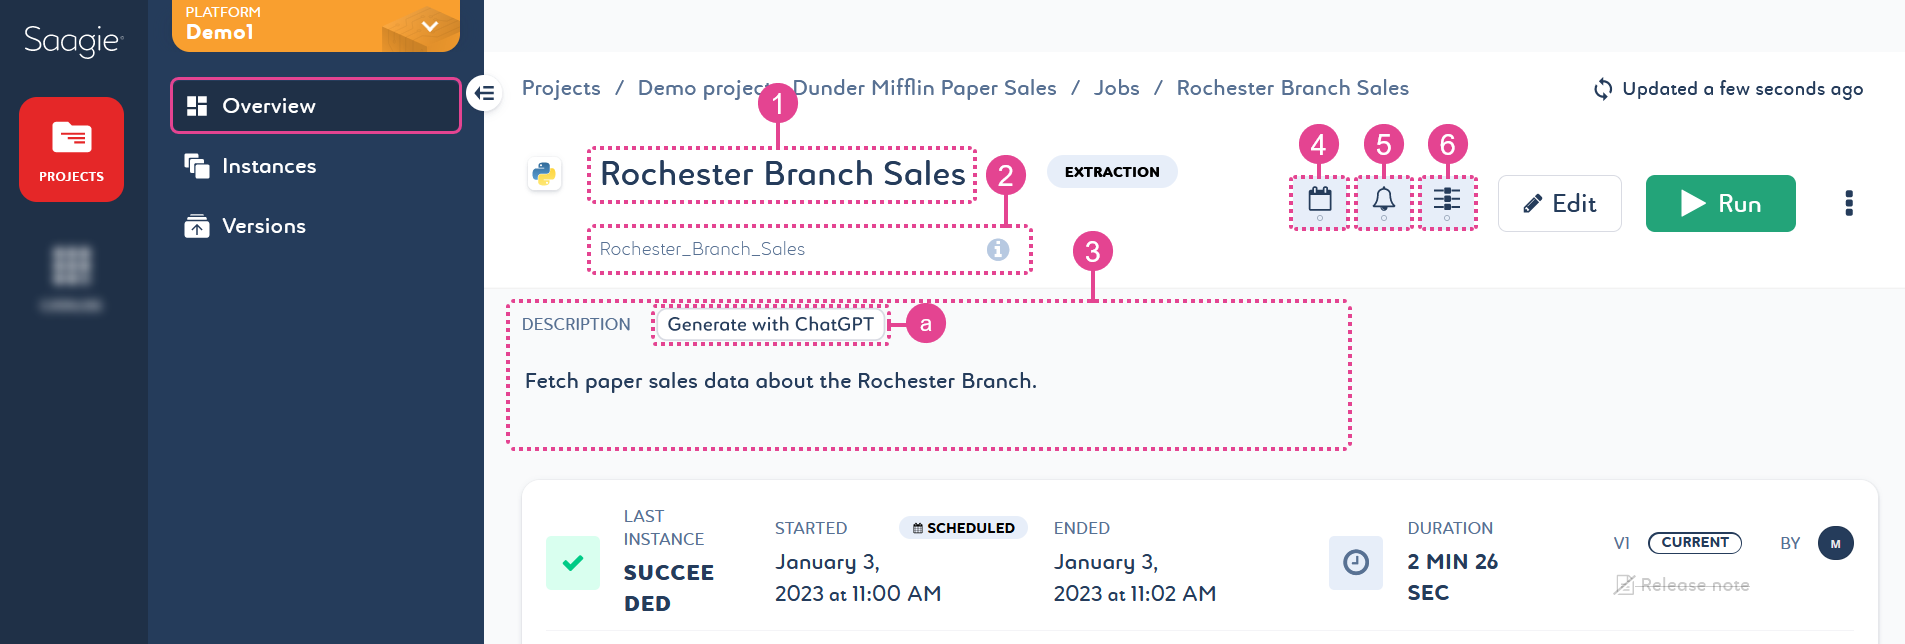
It includes the following non-versioned and editable features:
1. Name
Names are mandatory. They can be up to 255 characters long and must be unique within a project.
2. Alias
The job alias is unique to each job in a project. It allows you to reference a job within another job and can be used to pass information between jobs during pipeline execution. However, to make this work, the Variables setting must be enabled.
3. Description
Descriptions are optional and not restricted. However, it is a good practice to add them. Keep them short and to the point.
You can also use ChatGPT to generate your job description by clicking Generate with ChatGPT (a). For more information, see Generating a Job Description With ChatGPT.
This feature is only available for Spark with a Python context, Bash, R, Sqoop, and Python job technologies. It works with .py, .sh, .r, and .bash files and command lines, but it does not work with archive files.
|
4. Scheduled Run 
There are two types of execution:
-
The manual run, which requires you to click Run
 to start the job.
 -
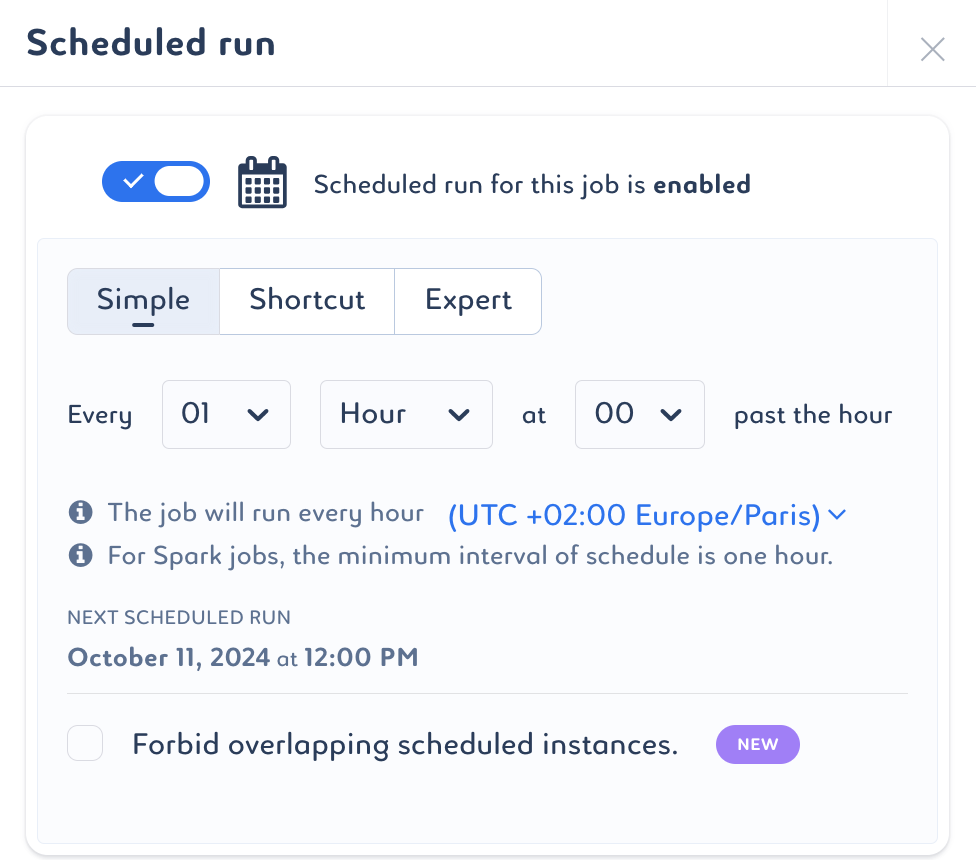
The scheduled run, which launches the job according to the schedule you choose. It has three schedule modes: Simple, Shortcut, and Expert.
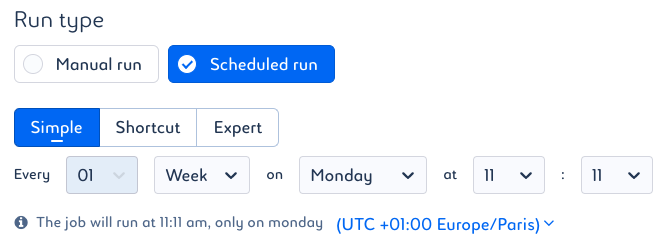
A scheduled job can always be run manually. In Simple mode, you can easily specify variables through the user interface. There are many options.
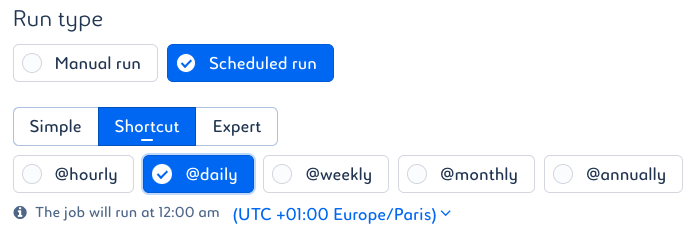
In Shortcut mode, you can choose the recurrence of your run on an hourly, daily, weekly, monthly, or annual basis. All other settings are automatic.
In Expert mode, you can specify variables using the Cron format. The Cron time string consists of five values separated by spaces:
[minute] [hour] [day of the month] [month] [day of the week]. They are based on the following information:Table 1. Cron format Descriptor Acceptable values Minute
0 to 59, or *
Hour
0 to 23, or *
Day of the month
1 to 31, or *
Month
1 to 12, or *
Day of the week
0 to 7 (0 and 7 both represent Sunday), or *
The Cron time string must contain entries for each character attribute. If you want to set a value using only minutes, you must have asterisk (*) characters for the other four attributes that you are not configuring. 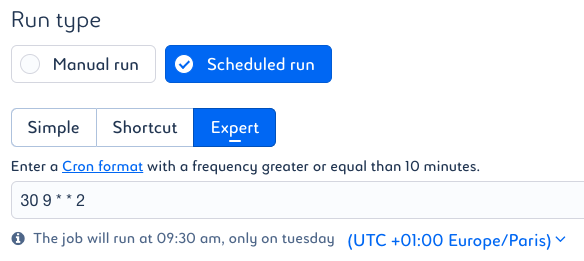
Regardless of the Scheduled run type selected, you can specify the time zone for your jobs or pipelines. When specifying its time and day, you should know that:
-
The default value in the time zone selection is your browser’s time zone.
-
The next schedule preview will be displayed in the time zone of your browser.
-
Daylight Saving Time (DST) is automatically adjusted.
-
Runs scheduled for the 29th, 30th, or 31st day of the month will not run in months with less than 29, 30, or 31 days.
Example 1. French time settingsUTC time is two hours behind French time, so if you want your job to run at midnight French time, set it to two hours later, that is, at 2 a.m.
Once you have finished scheduling your run, you will see the summary of your choice written below and the time of the next run.
-
|
By default, instances can run at the same time. To prevent this, select the Forbid overlapping scheduled instances option. This means that if your job is still running when the next scheduled run is due, it will be skipped. |
5. Alerts 
Alerts are optional and can be set to receive an email when the status of your job changes. They can be sent to multiple email addresses to notify you of the following status changes:
| Status | Description | ||
|---|---|---|---|
|
The job’s run has been requested and is being executed. |
||
|
The job is waiting for the necessary resources to be executed. |
||
|
The job is up and running. |
||
|
The job has crashed.
|
||
|
The job is stopping. |
||
|
The job has stopped running. |
||
|
The job has been successfully executed. |
||
|
The job no longer runs because an error has occurred. |
6. Resources 
CPU, RAM, and GPU resources are optional, but are recommended. They can be specified for optimal execution.
The consumption of your job can be managed by guaranteed resources, that is, the minimum amount of resource requested, and limited resources, that is, the maximum amount of resource that can be consumed.
When you create your job, CPU and RAM resource management is enabled by default with predefined values. In other words, based on the default values defined at technology level, Saagie automatically assigns resource requests and limits to your job. These values can be adjusted to suit your needs.
|
Default values are already set by Saagie at the technology level. These values are mandatory. They also exist at the technology context level, where they can override the values defined at the technology level. You can configure them when you create your job, or by modifying the Resources |
If the resource capacity is not defined, the defaults that are defined at the technology level will be assigned at the technology context level.
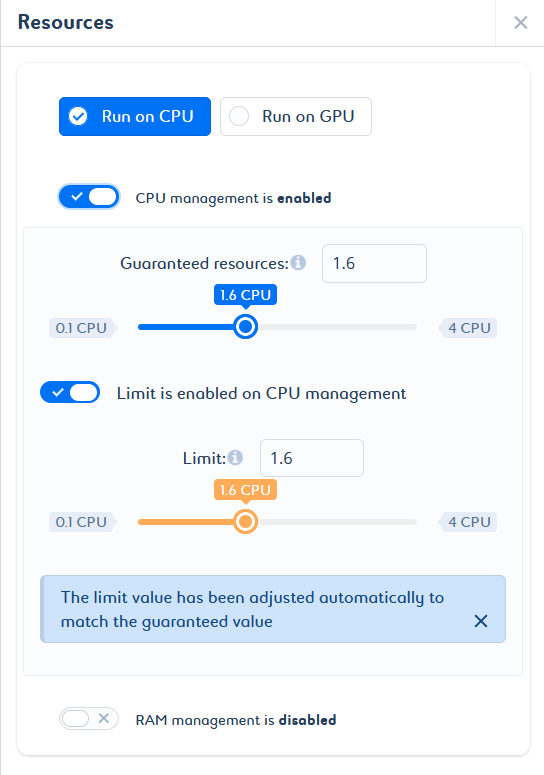
Automatic adjustments can be made to avoid inconsistent configurations. If you try to set a guaranteed value that is greater than the limit value, a note appears to inform you that the guaranteed value has been adjusted. If you try to set a limit value smaller than the guaranteed value, a note appears to inform you that the limit value has been adjusted (a).
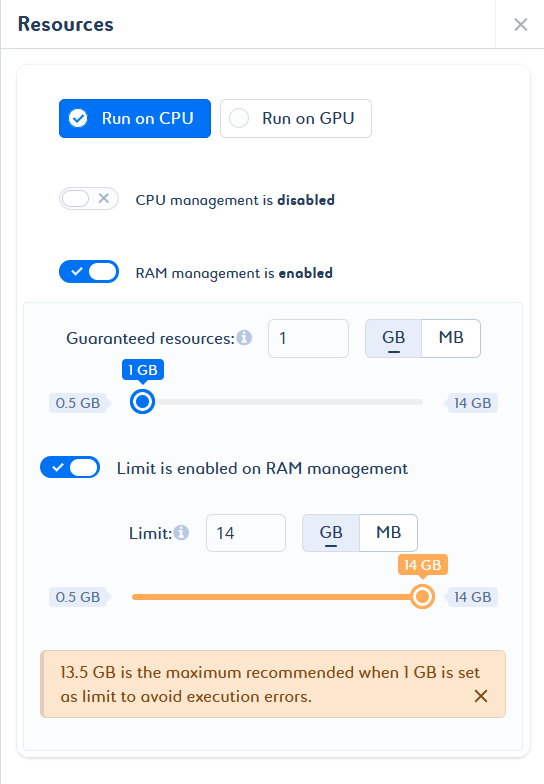
In addition, if the guaranteed value and the limit value are not optimal, a message is displayed with the appropriate values for an optimal configuration (b).
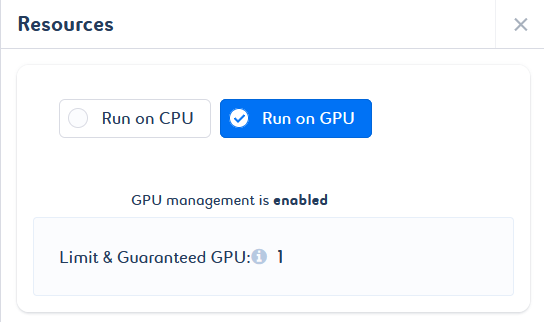
To enable GPU management on your job, select the Run on GPU option. You do not need to configure it, as a default value is set for both limited and guaranteed resources. This value cannot be changed.
| When you change the CPU, RAM, and GPU resources, your job is automatically restarted. |
