About Jobs
The ![]() Jobs page lets you access the library of embedded of a project.
Jobs page lets you access the library of embedded of a project.
- What is a job?
-
A job is a computation task performed inside projects on Saagie. Jobs run through a command line and can be launched individually or as part of a data pipeline.
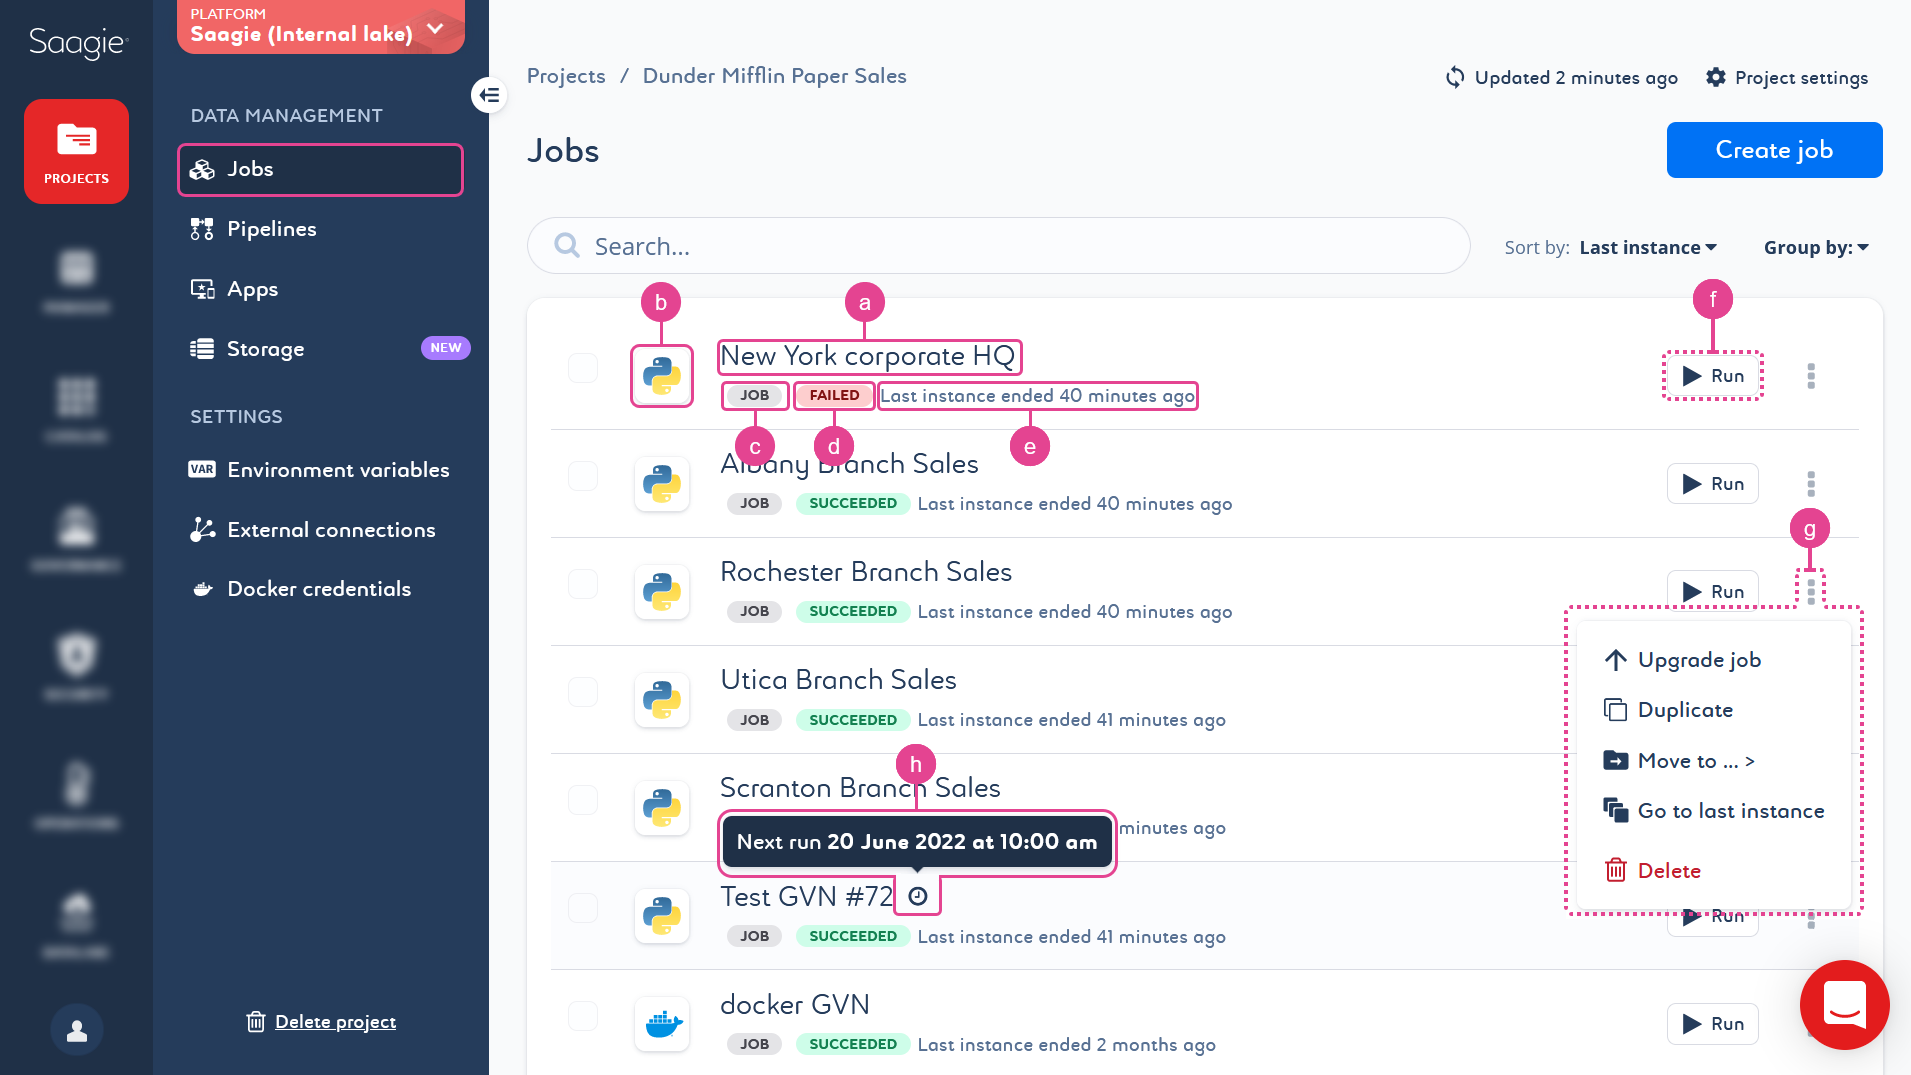
Jobs are listed with some basic information, such as the name (a), technology used (b), job type (c), status (d), and last instance executed (e).
From the job library, you can also run a job (f), upgrade it, duplicate its Current ![]() version, move it to another project, go to its last instance, or delete it (g).
version, move it to another project, go to its last instance, or delete it (g).
|
A clock |
When you create a job, you select a category and a technology for it. The technologies that are available in each category depend on the technologies that you selected when you created the project.
|
If the technology you need does not appear in the list of available technologies, that means it was not selected when the project was created. You will either have to choose another technology or update the project settings to include the technology you need. Besides, the category and technology of a job cannot be changed after the job is created. If you want to change them, you will have to create a new job. |
A job category does not impact the job execution, it helps you to organize your jobs. There are three default job categories:
-
Extraction: For jobs that retrieve data.
-
Processing: For jobs that process data.
-
Smart Apps: For jobs that use or expose data.
When you select your technology, it is important to note that the technologies have different requirements. For more information, see the following table:
| Technology | File type | Default shell command |
|
|---|---|---|---|
Bash |
Any file type (Optional) |
|
|
Generic |
Docker image |
none |
|
Java/Scala |
|
|
|
Python |
|
|
|
R |
|
|
|
Spark |
|
|
|
Sqoop |
Any file type (Optional) |
|
|
Talend |
|
|
|
Click a job to access its:
Overview Page
The ![]() Overview page gives general information on your job.
Overview page gives general information on your job.
By default, the page opens when you click a job in the project’s job library.
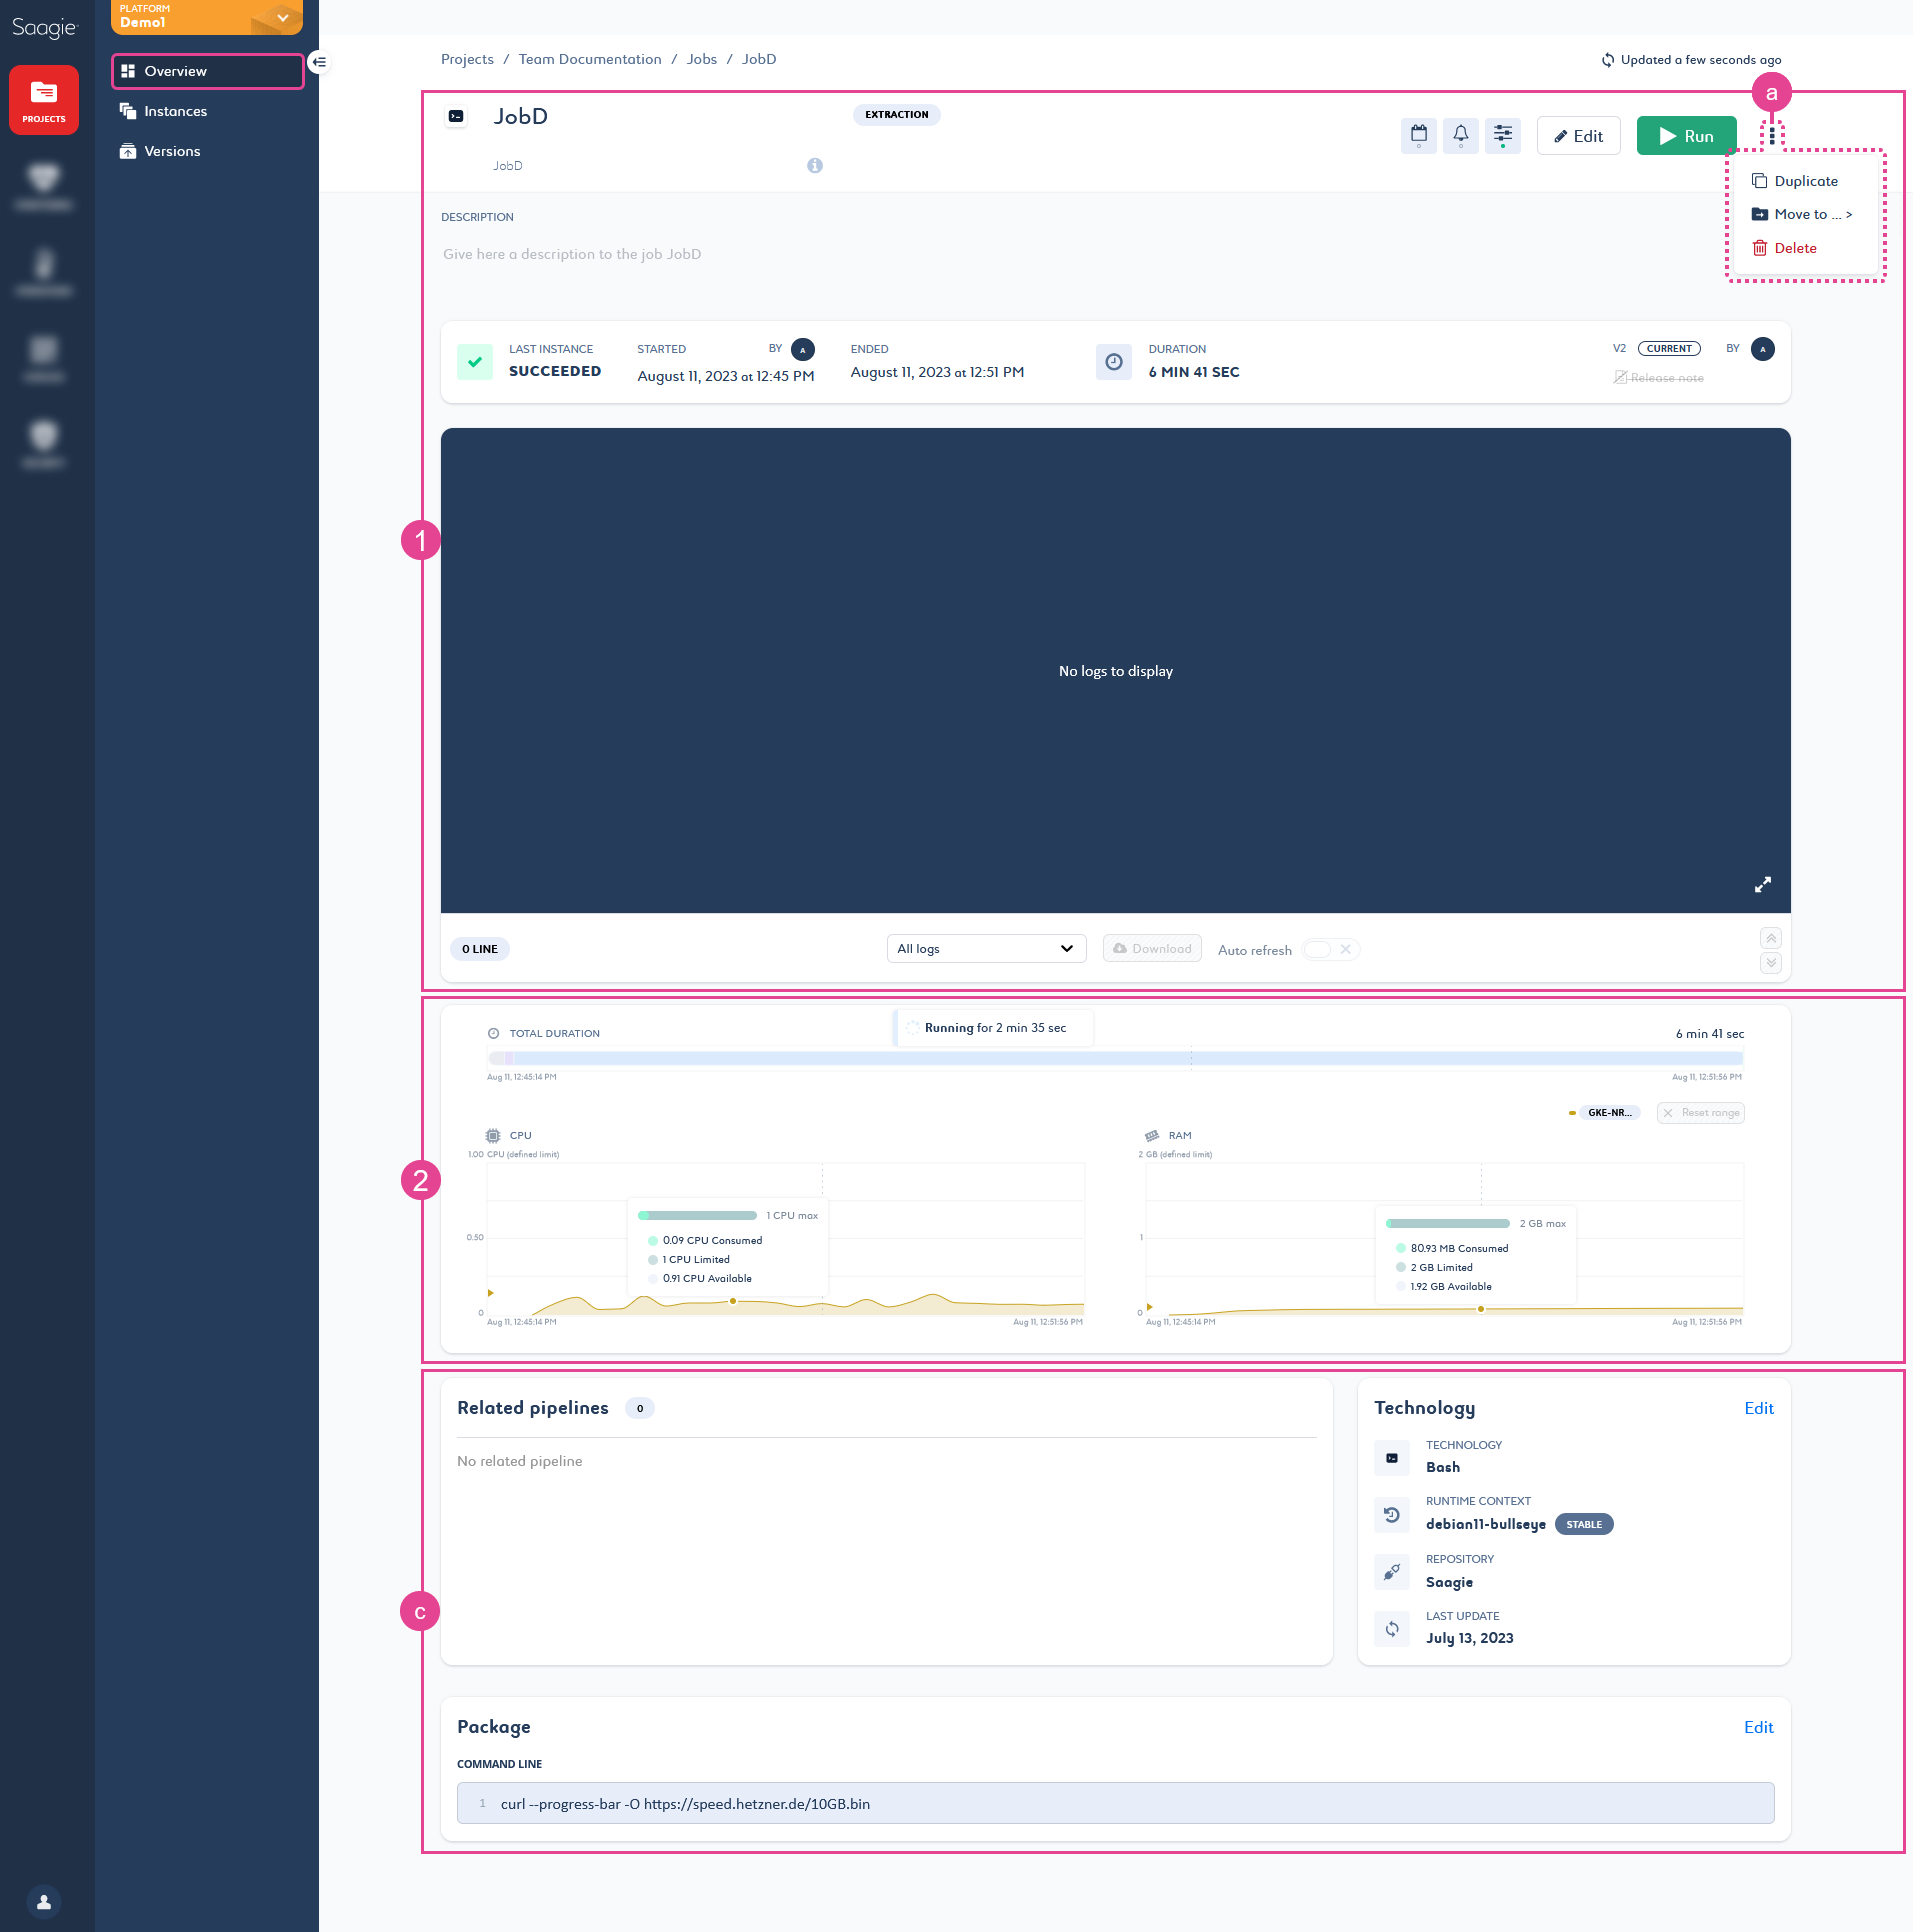
The first part of the page (1) gives general information on the job, such as category, last instance details, version used, name, and alias.
It allows you to manage your job settings and upgrade your job to create a new version of it. It also allows you to duplicate the Current ![]() job version, move the job to another project, or delete it (a).
job version, move the job to another project, or delete it (a).
You can also view the logs of your job.
-
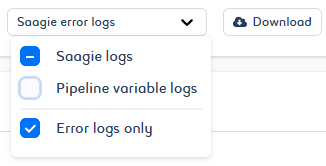
For embedded jobs, you can choose to view and download Saagie Logs, Pipeline Variable Logs, or Error Logs Only for each.
The second part of the page (2) gives information on job runtime and consumption through a timeline and various graphs.
You can use the timeline to see the execution time of the running and terminated job, along with the different types of status it has gone through. This allows you to determine the performance of your job. If it is not effective enough, you can optimize it accordingly. You can then use the graphs to check your job consumption during and after its execution.
|
|
Monitoring the RAM consumption of your job can help you anticipate potential memory issues. Indeed, a job that consumes more than the available RAM limit goes into an You can define a RAM limit for your job in its settings. If you have not defined a RAM limit, the job will run according to the overall RAM capacity of the node. In both cases, adjust the RAM limit for your node or job to ensure successful execution. For more information on monitoring your platform resources, see About the Monitoring Module. |
The third part of the page (3) gives information on the pipelines related to the job and on the technology. It also gives information on the job package.
|
When you push a job via the Saagie CI/CD process, a link to the source code is added to the package of the job. 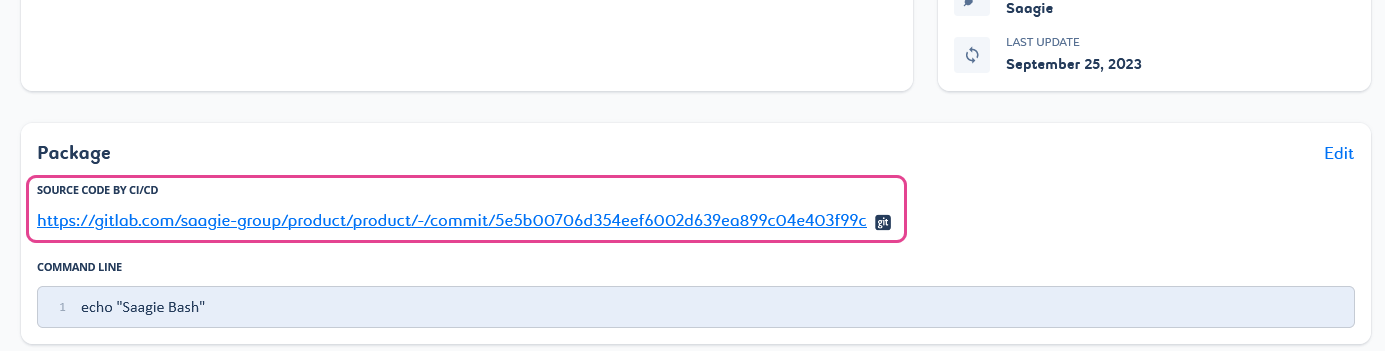
Figure 1. Link to the source code generated by CI/CD on a job.
You cannot change this link by hand. Also, if you change your job package via the Saagie platform, the link to the source code is removed as it is no longer relevant. However, it remains accessible from the corresponding version of your job. |
Instances Page
The ![]() Instances page gives information on your job instances and allows you to keep track of all executed instances.
Instances page gives information on your job instances and allows you to keep track of all executed instances.
- What is an instance?
-
An instance is a single run of a job or pipeline in a project. The execution information and logs of all instances are saved on your platform.
Each time you run a job, you create a new instance of it. All instances are saved and remain accessible. They are listed on the right side of the page (1). You can see their information by selecting them in the list. You can also delete instances from this list.
By default, the page opens on the last executed instance of the selected job.
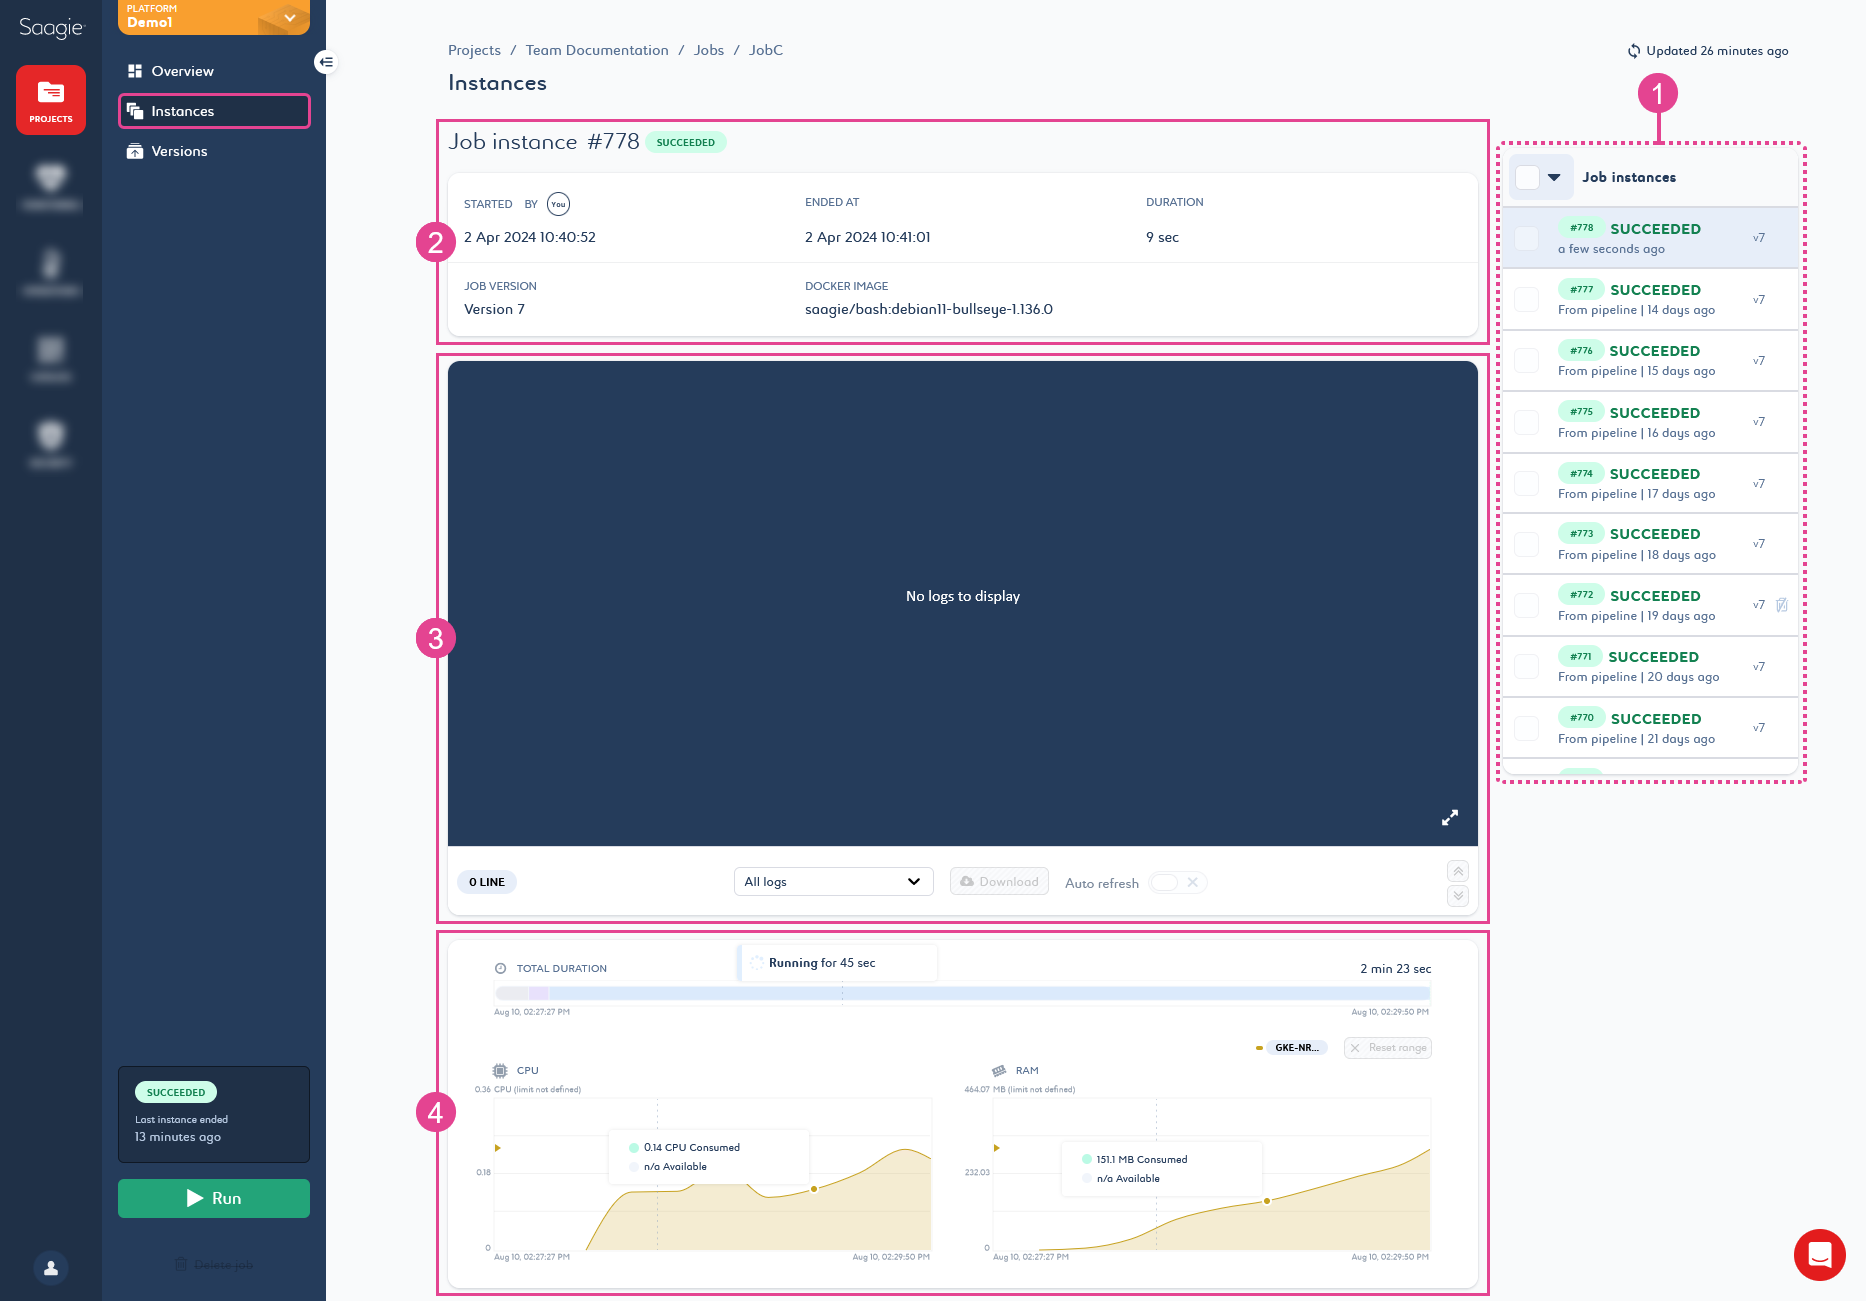
The first part of the page (2) gives general information on the job instance, such as the instance number (specified by #001 in the title), execution details, such as the status, start date and author, and end time. It also indicates the job version used.
The second part of the page (3) gives information about the job logs.
-
For embedded jobs, you can choose to view and download Saagie Logs, Pipeline Variable Logs, or Error Logs Only for each.
The third part of the page (4) gives information on the consumption and runtime of the selected job instance through a timeline and various graphs.
You can use the timeline to see the execution time of the running and terminated job, along with the different types of status it has gone through. This allows you to determine the performance of your job. If it is not effective enough, you can optimize it accordingly. You can then use the graphs to check your job consumption during and after its execution.
|
Versions Page
The ![]() Versions page gives information on the version of your job. It also keeps track of all previous versions.
Versions page gives information on the version of your job. It also keeps track of all previous versions.
- What is a version?
-
A version is a single iteration of a job, pipeline, or app. Each new upgrade is stored as a version, so you can roll back to previous iterations and keep track of the changes that have been made.
Each time you upgrade a job, you create a new version of it. This version is automatically defined as the Current ![]() version.
version.
All versions are saved and remain accessible. They are listed on the right side of the page (1), and you can see the information of a version by selecting it in the list. You can also delete versions from this list.
You can switch back and forth between versions by selecting a version from the list and clicking Rollback to this version (2). The selected version then becomes the new Current ![]() version.
version.
| You can define a version as major to highlight the most stable job version. Select a version from the list and click Set as major version (3). The version appears with the Major version label and sparks in front of its line. Click Unset as a major version to remove the label from a version. |
By default, the page opens on the version of the job in use, tagged with the Current ![]() badge.
badge.
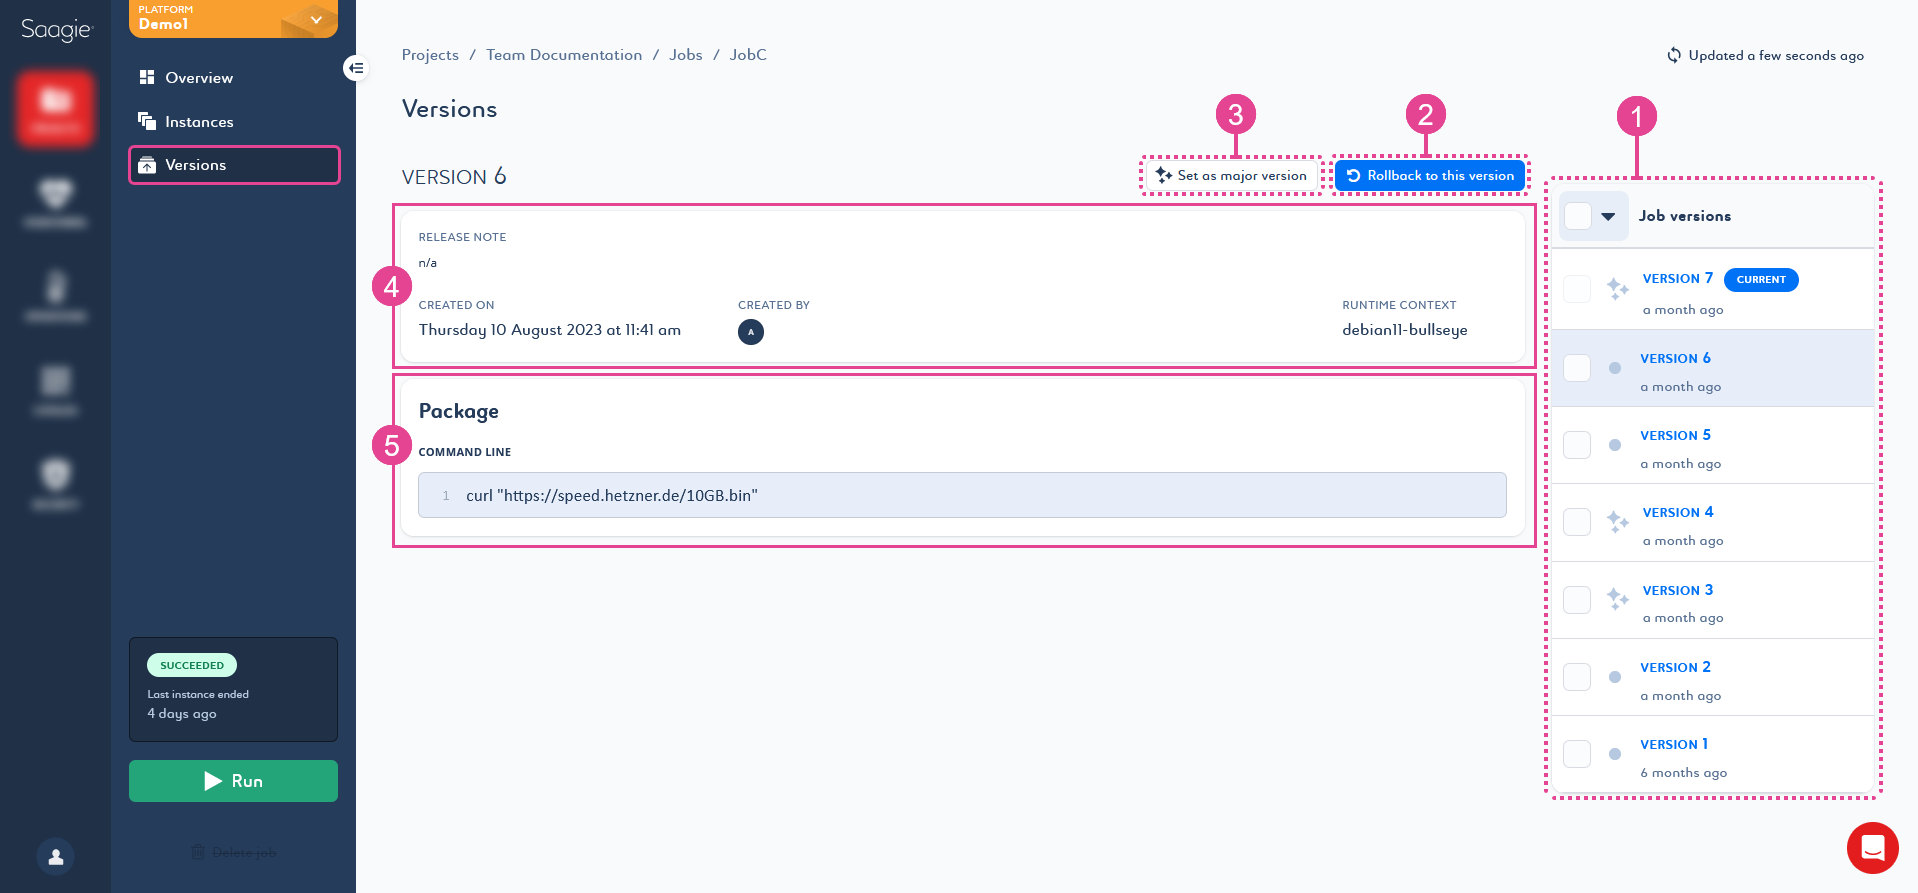
The first part of the page (4) gives general information on the version, such as the release note, creation date and creator, and execution context.
The second part of the page (5) displays:
-
For embedded jobs, information about the job package.